
Hey everyone! I hope you are having a fabulous day out there! So, in today’s blog post, let me share the perks of using Power Apps for custom business app development. Recently, I had a chance to work on a project using Power apps, and here is how it helped me to build a business app in less time.
Let’s Get Acquainted With Microsoft Power Apps
Introduced a few years ago by Microsoft, Power Apps is a suite of services, apps, and connectors that offers low-code and a rapid development environment for developers to leverage. From opening doors for non-professional developers to create business apps without worrying about data storage to reducing the overall time for developing apps, it has made business app development seamless. That said, here is why Power apps are the best choice for building business apps.
Rapid Development
Power apps have multiple features, making them the best choice for building business apps. Some of the noteworthy features of Power apps that create a rapid development environment for developers include data connectors, business logic, user interface controls, etc.,
Drag-and-Drop Interface
Power apps give a drag-and-drop interface for users to leverage. As a result, it makes creating custom interfaces and workflow easy and seamless.
Cross-Functional & Responsive Interface
The power apps platform is cross-functional and runs on web and mobile devices. They have a responsible interface on multiple devices making the users develop business apps without much coding.
Integration With Other Microsoft Products
Power apps seamlessly integrate with other Microsoft tools like Power BI and Dynamics 365; making it easy for users to develop integrated solutions.
Creating a Reimbursement Application Using Power Apps: Our Story
So, when I worked with my team on this project to create a reimbursement application, the one challenging parameter we had to optimize was mitigating the time it took to develop the whole application. And when we looked into our choices in the market for building business apps in less time, Power Apps from Microsoft emerged as a feasible solution. Now, here is how we use it to create a reimbursement application for submitting requests in a few steps.
Let’s dive into the steps I followed with my team!
Steps Followed in Building a Reimbursement App With Power Apps
The steps followed here will elaborate on storing the data in SharePoint, sending reimbursement requests via Outlook 365, adding external users using Azure, and implementing a multi-level approval process. By combining these functionalities, we can create a comprehensive reimbursement solution that enhances efficiency, collaboration, and approval workflows within your organization.
Designing the user interface
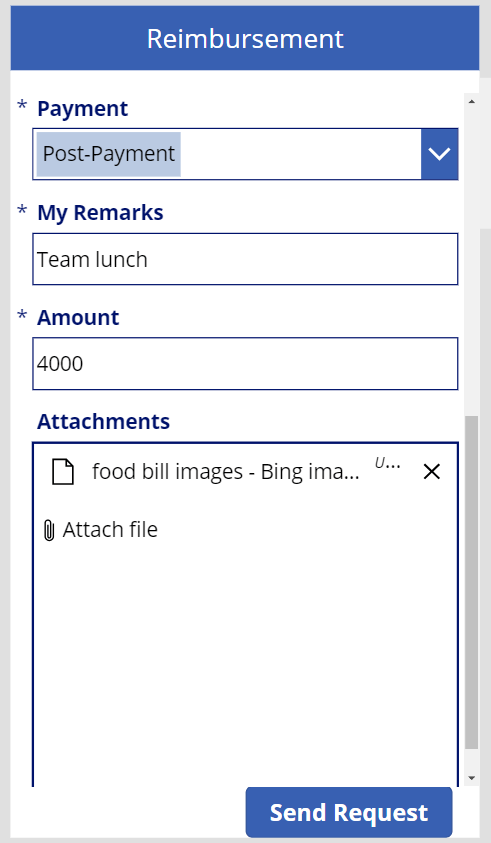
Initially, using PowerApps’ intuitive interface, design the user interface for your reimbursement application. Include fields such as employee name, expense amount, date, description, and expense category. And make the application to be user-friendly, ensuring easy navigation and data input.
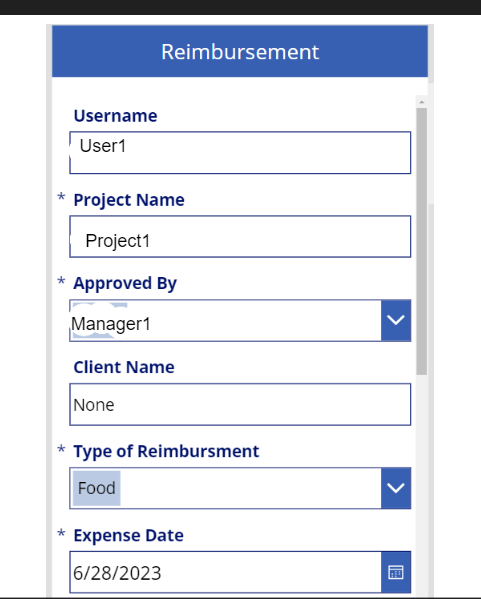
Figure (i): Screenshots of User request area
Connecting to SharePoint for Data Storage:
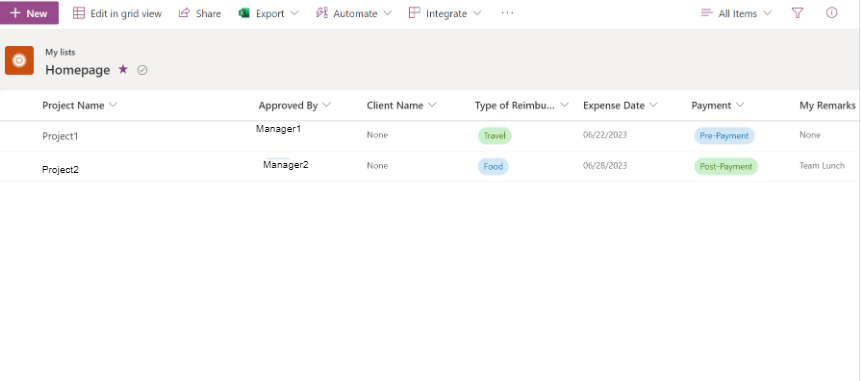
In this step, we connect PowerApps to a SharePoint list to store the reimbursement application data. SharePoint provides a structured and secure environment for data management. Create a SharePoint list with appropriate columns to capture reimbursement details. And establish a connection between PowerApps and the SharePoint list to enable data retrieval and submission.
Figure (ii):Screenshots of connecting to SharePoint for data storage
Implement Data Validation
After connecting Power Apps with Sharepoint, the next step is implementing data validation rules in Power Apps. This ensures accurate reimbursement submissions. So, we use PowerApps’ built-in validation capabilities to enforce mandatory fields, validate data formats, and perform calculations if needed. Data validation helps maintain data integrity and prevents errors in reimbursement requests.
Integrate Outlook 365 for Request Sending
In this step, we integrate PowerApps with Outlook 365 to enable reimbursement request sending. Use Power Automate (formerly Power Automate) to create a flow that triggers when a reimbursement request is submitted. Configure the flow to send an email notification containing the reimbursement details to the appropriate approvers. Leverage Outlook 365’s email capabilities to facilitate efficient communication and request tracking.
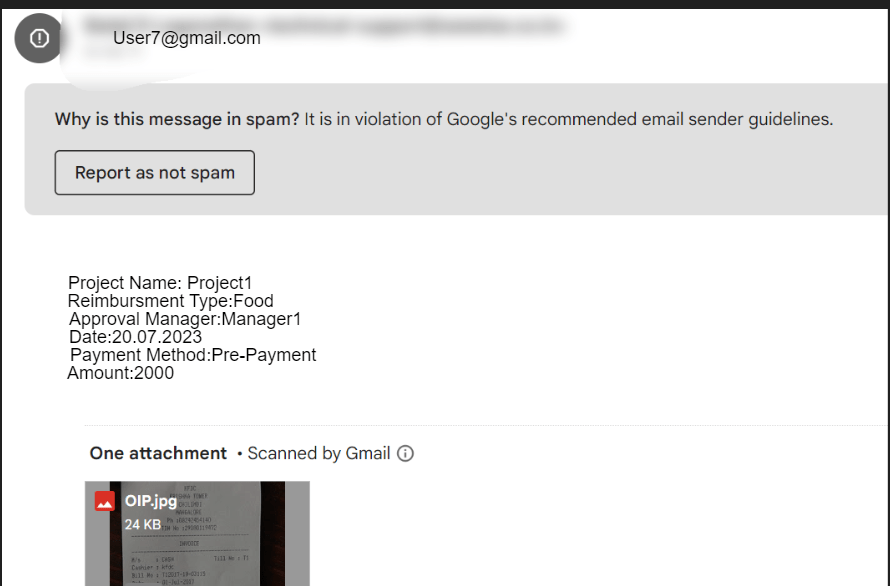
Figure (iii): Screenshots of Integrate Outlook 365 for Request Sending
Store and Manage External User Data Using Azure:
Now, if the reimbursement application you are designing is for external users, in that case, utilizing Azure Active Directory (Azure AD) will come in handy for user management. Create an Azure AD tenant and add external users to it. Use Azure AD B2B (Business-to-Business) collaboration features to invite and manage external users’ access. This ensures secure and controlled access for external stakeholders while maintaining data privacy.

Figure (iv):Screenshots of Store and Manage External User Data Using Azure
Implement Multi-Level Approval Workflow:
Now, let’s accommodate the three-level approval process for enhancing the reimbursement application with multi-level approval workflows. For this enhancement, we use Power Automate to design a flow that includes multiple approval stages. Configure the flow to send email notifications to each manager in sequence, allowing them to review and approve/reject the reimbursement request. Use conditions and actions in the flow to handle different outcomes at each level.
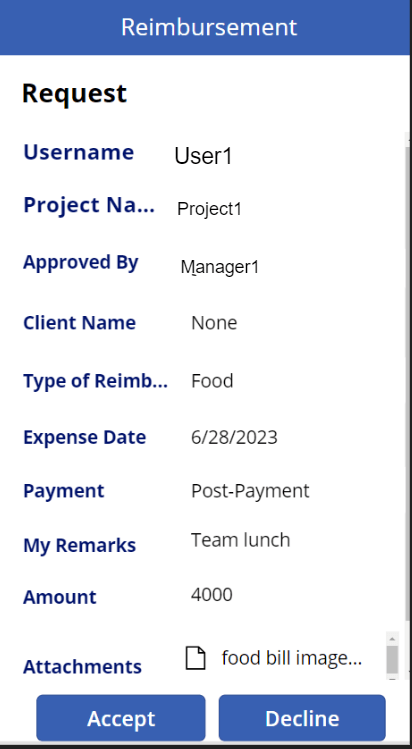
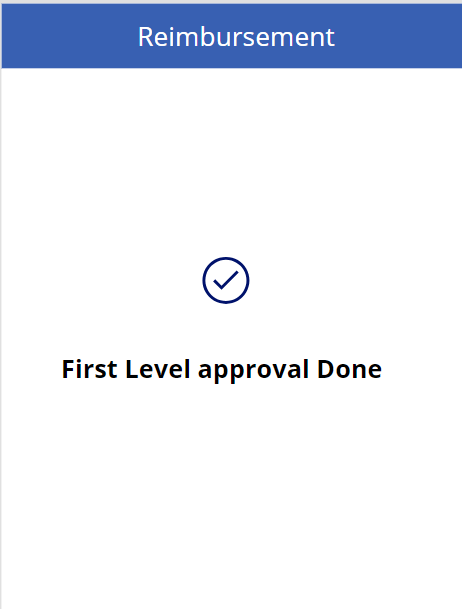
Figure (v):Screenshots of Implement Multi-Level Approval Workflow
Conclusion:
So, readers! I hope this blog has been insightful about creating business apps with Power apps. That being said, PowerApps is accessible and user-friendly for everyone. Its intuitive interface and drag-and-drop features make it easy to create custom applications without extensive coding knowledge. Whether you’re a beginner or an experienced user, PowerApps is one of the best choices for making business apps in less time. Therefore, keep exploring and leveraging the capabilities of PowerApps and innovate new applications for your specific needs. Meanwhile, let me meet you in another blog with another interesting topic!
