Push Notification is one of the challenging concept in all smart phones. Especially when it comes to Iphone push, it is quite long process. I recently had a chance to try Push notification in Iphone.
The most difficult task is to create SSL certificate and Provisional certificate. Let’s see how to create it and make use of it.
1. Create Certificate Signing Request (CSR)
- Open Keychain Access application in your mac and generate CSR as follows
* Request a Certificate from authority as shown
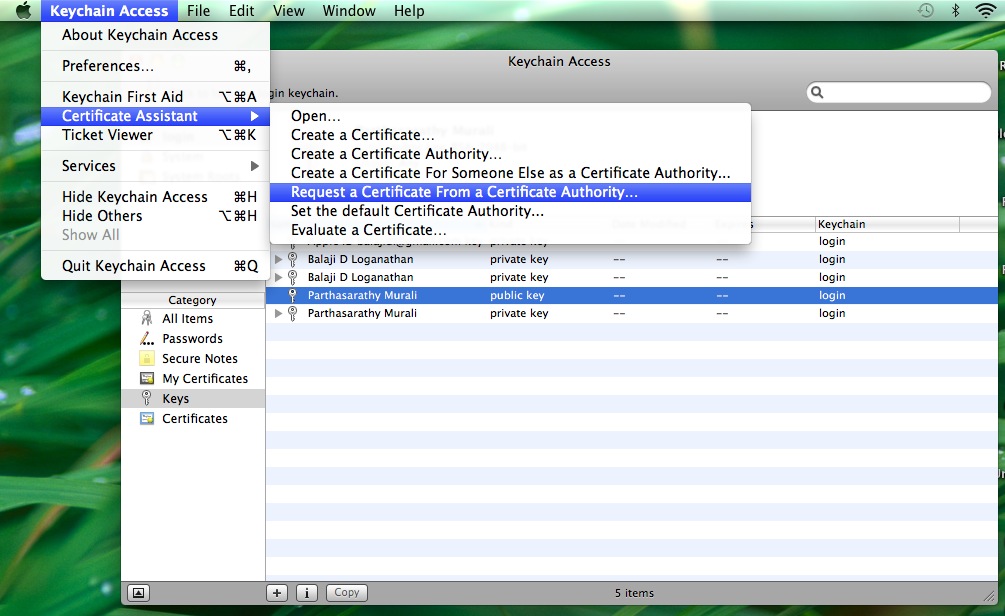
* It will open a dialog, follow the process to create the certificate. The certificate with certSigningRequest extension will be created.
Save the certificate to disk for further use
2. Create SSL Certificate
- We can create our ssl certificate in provisioning portal of IOS dev center. The steps to create SSL certificate
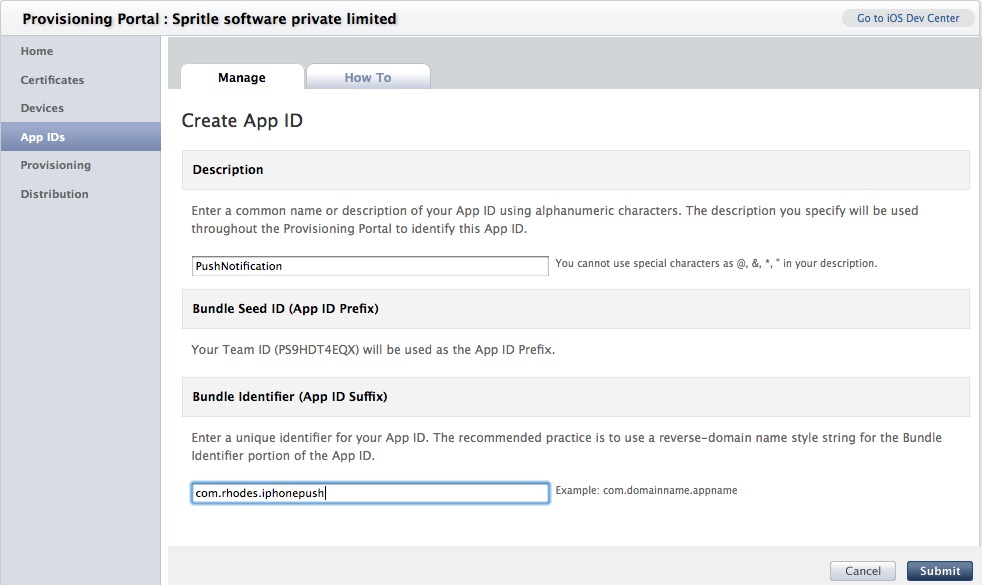
* Create a New App ID by clicking on APP IDs in the left menu as shown
* To enable Push Notification, check the Enable Push Notification Service box and clicking Configure button will open an dialog box as shown
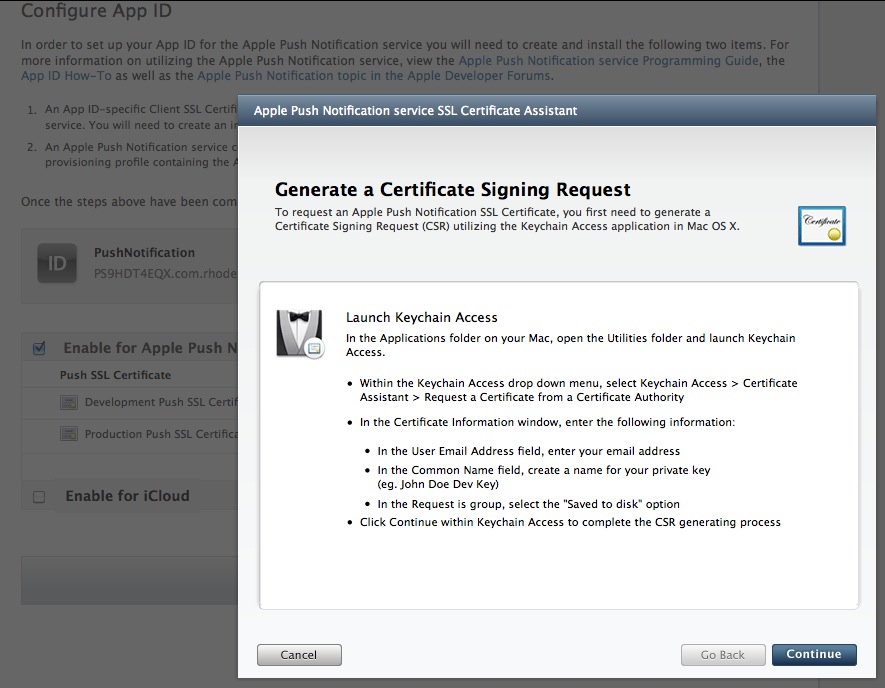
* The Dialog will prompt for CSR certificate. Upload the certificate just created in above steps and follow the window to create APN certificate
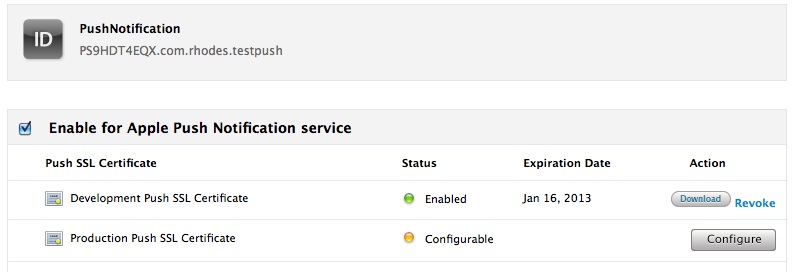
* APN certificate with cer extension will be generated for given request and you can download it as shown
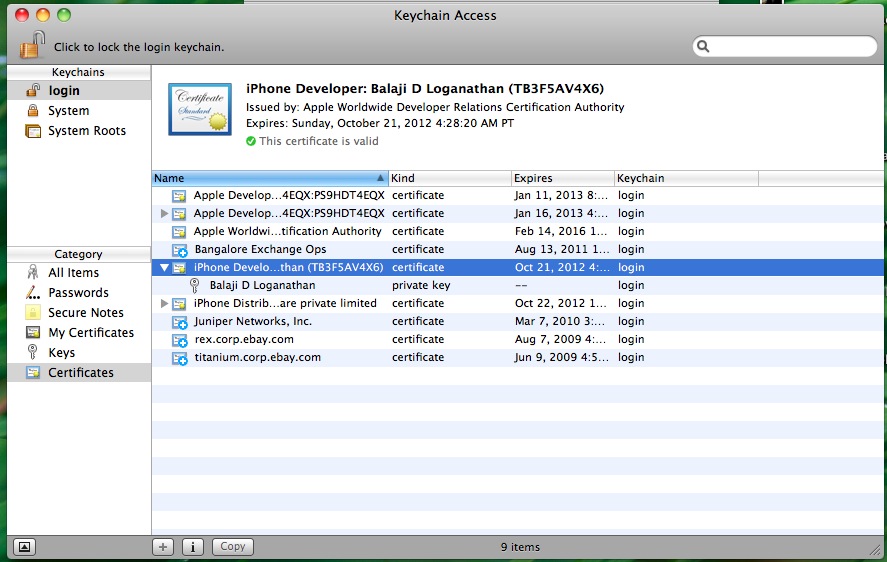
* Opening it in Keychain Access, you will able to see Certificate, Private,Public Key as shown
3. Create Provisioning Profile
- Now we have to create a Provisioning profile for newly created SSL certificate. The steps are
* Create Provisioning profile by clicking Provisioning in left menu of IOS provisioning portal as shown
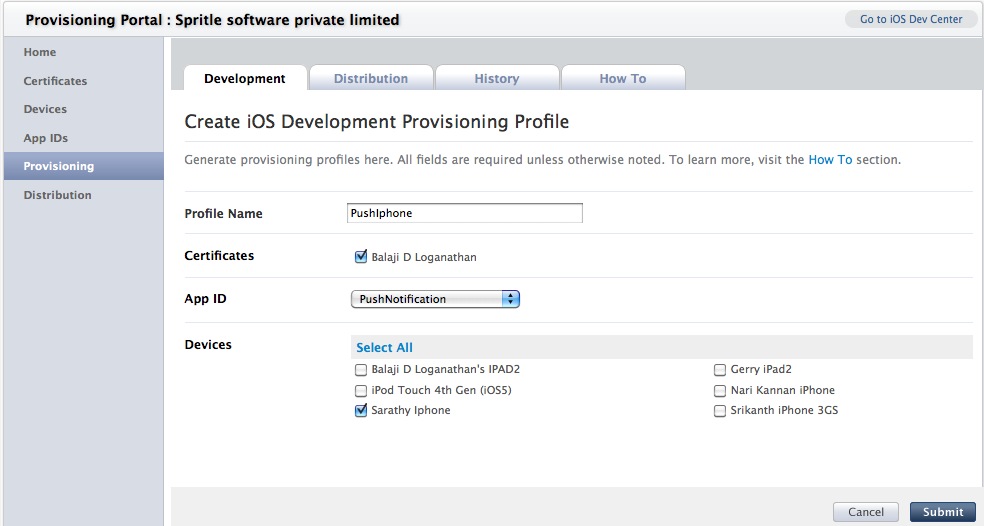
* By filling the necessary details, Development Provisioning profile with mobileprovision will be generated as shown
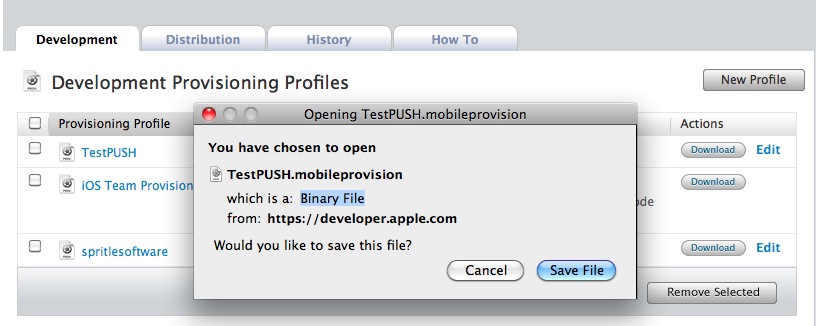
* Download,open it in Xcode and install the profile for your iphone/ipad.
4. Export APN certificate to .pem format
- We need to export the generated .cer certificate to .pem format as follows
* Open KeyAccess, Select your generated certificate alone with private key and export it to p12 format as shown
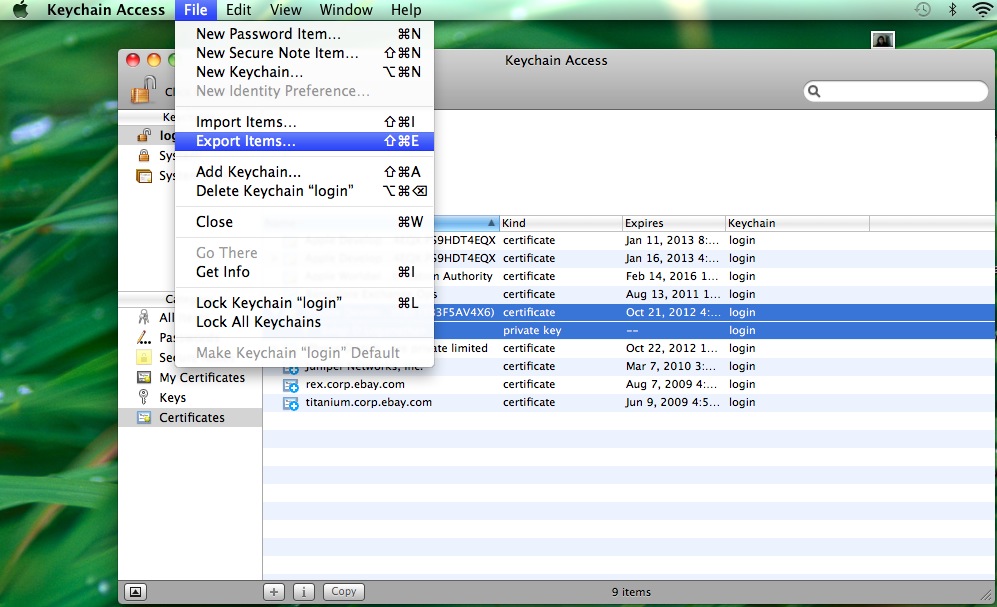
* In terminal, use the following code to export it to pem format
[source language=”ruby”]
openssl pkcs12 -in CertificateName.p12 -out CertificateName.pem -nodes
[/source]
Make a note .pem certificate file, we will use it in ruby
5. Device Token
- Each Device has token associated with it. We need to get the Device Token in order to make communication with that device. In rhodes it is much easier to retrieve the device token. The steps to get device token using rhodes
* Create a rhodes app
[source language=”ruby”]
rhodes app app_name
[/source]
* Enable push in build.yml
[source language=”ruby”]
capablities:
– push
[/source]
* In terminal, type the following to run your rhodes app in Iphone through Xcode
[source language=”ruby”]
rake swtich_app
rake build:iphone:setup_xcode_project
[/source]
* Connect you device to Mac. Open rrhorunner.xcodeproj in Xcode and run the rhodes app in your device.
* Running you app in device will prompt you to allow for notification as follows
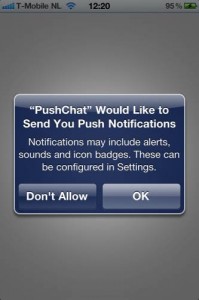
* Clicking Allow will get the device id from device. You can get the device id from the log window of xcode or through code as
[source language=”ruby”]
System.get(‘device_id’) # => D12f5sad7673-h543
[/source]
6. Send Messages using ruby gem
- Once you have all the necessary things needed to communicate with IOS device, we can use apns gem exclusively for IOS device. The steps are
* First install apns gem as
[source language=”ruby”]
gem install apns
[/source]
* Configure apns with your generated pem file, device token as
[source language=”ruby”]
APNS.host = ‘gateway.sandbox.push.apple.com’
APNS.pem = ‘/path/to/your/cert.pem’
APNS.port = 2195
device_token = ‘your_device_token’
[/source]
* Send notification to your ios device as
[source language=”ruby”]
APNS.send_notification(device_token, ‘Hello iPhone!’)
[/source]
The entire code looks like
- [source language=”ruby”]
require ‘apns’
APNS.host = ‘gateway.sandbox.push.apple.com’
APNS.pem = ‘/path/to/your/cert.pem’
APNS.port = 2195
device_token = ‘your_device_token’
APNS.send_notification(device_token, ‘Hello iPhone!’)
[/source]
Note : Mobile Provision will not be installed in your xcode until it has the proper private key associated with it.
We will get an message in IOS device. I hope this blog would be useful to send push notification in Iphone using ruby gem. Any suggestion or comments are most welcome

Dear Dhepthi,
Thanks for the information and Keep up the good work. Appreciate your way of sharing knowledge. Very Good.
Regards,
Preethy
This is exactly what I was looking for. Thanks for the info.
Hi Dhepthi, Thanks for the tutorial for setting up push messages on Rhomobile. I am running into an issue where System.get(‘device_id’) is coming back blank and I actually dont get the application notification that the mobile application is asking for permission on receiving notifications I am running rhodes 3.5.1.13. Any help would be really appreciated. Thanks