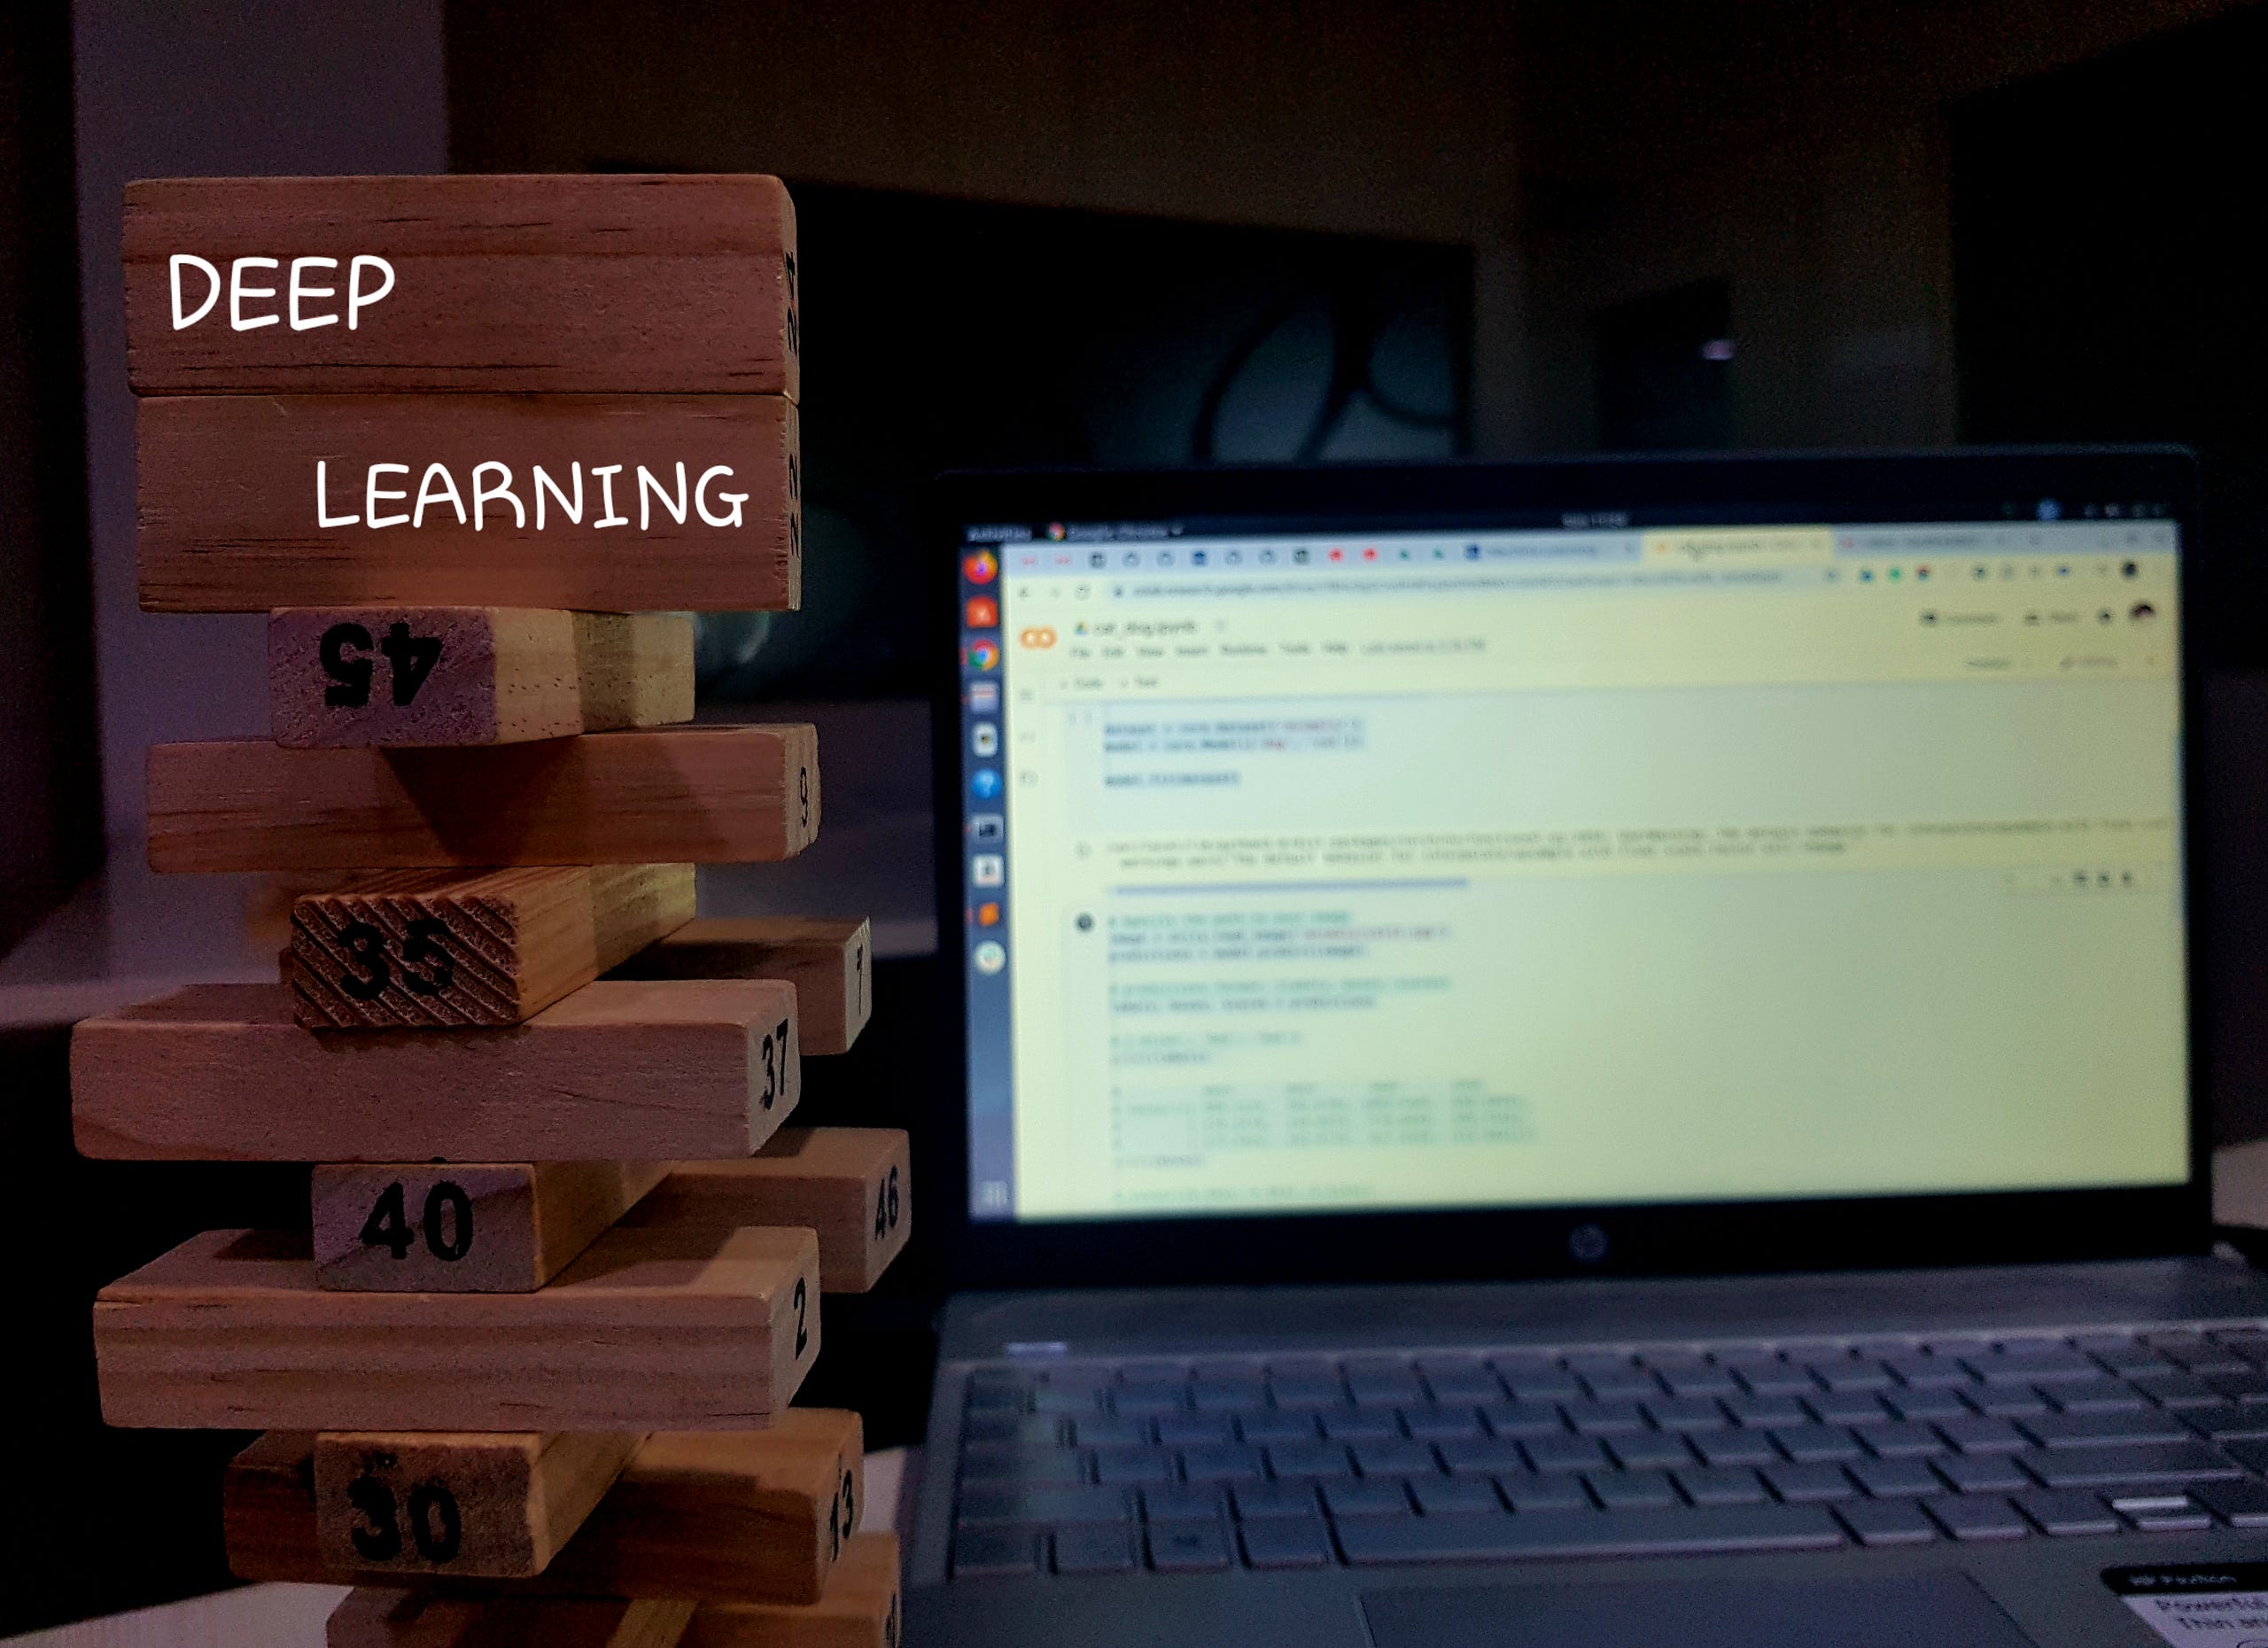
Nowadays, Most of the people are crazy about Machine Learning and Computer vision. It does some incredible stuff. Recently, I heard the news about self-driving cars and mask detection also face recognition. During the Covid-19 Quarantine, Lots of people have done with mask detection. Yes, I am also one of them. Here I have mostly covered about How to create a Custom Object Detection Model using Detecto?
I felt like, in machine learning, the most complicated part is How to train a model? Initially, I have mostly work with pre-trained models. The custom one takes a long to process and it deals with lots of file changes. Now we don’t worry about it. yes, I have a better solution to train a custom model.
Why do we need to train a custom model?
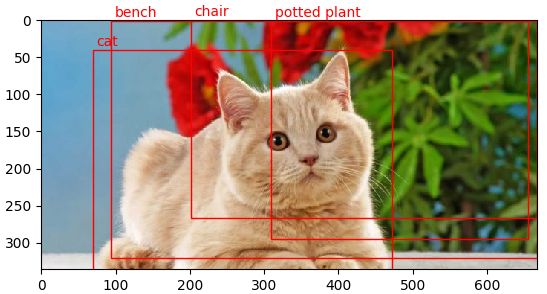
For example, I need to detect cats on some images. If I use the pre-trained public model to do this, I will get a result of something like the below image. So, the pre-trained model has many objects. That’s why we need a custom model.
Most of the developers have used only the existing trained models. And even they have the struggle to build their computer vision models.
I present a simple way for anyone to build fully-functional object detection models with just a few lines of code. More specifically, we’ll be using Detecto, a Python package built on top of PyTorch that makes the process easy and open to programmers at all levels.
How to use Detecto
Detecto is one of the best ways to train the custom model to compare to other things. We don’t need to download any Github repo like TensorFlow or skeleton. Simply copy and paste work.
This is a simple python package to train your custom model. Here I’m going to explain how it works. You can install the Detecto package using pip:
pip3 install detecto

Download this sample image as ‘apple.jpg’ and create a Python file in the same folder as the image. Inside the file copy-paste the below code.
from detecto import core, utils, visualize
image = utils.read_image(‘apple.jpg’)
#Initializes a pre-trained model
model = core.Model()
labels, boxes, scores = model.predict_top(image)
visualize.show_labeled_image(image, boxes, labels)
After running this code, You will see the result something like the below image.
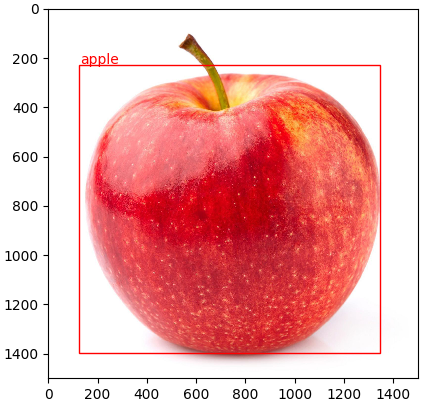
It works with an existing Detecto’s pre-trained model. Before starting to train your model, you need to check your computer to enable GPU. The following code will help to check your GPU status.
import torch
print(torch.cuda.is_available())
If it prints True, GPU enabled. If it prints False, GPU not enabled. I highly recommend GPU enabled computer for this process. If you do not have, you can continue this process. But, it will take some time to train your model.
Here I have listed simple 5 steps to train your Object Detection Model
- Prepare images for the Dataset
- Image Annotations with LabelImg
- Setup Google Colaboratory Notebook
- Train a custom model using Detecto
- Save and Test your model
Prepare images for the Dataset
Whenever you are going to train a custom model, The important thing is IMAGES. Yes, of course, the images play a main role in deep learning. The accuracy will be based on the images. So, before training a custom model, you need to plan How to get images?
I have already explained more about How to prepare the dataset? Please check the below article.
Image Annotations with LabelImg
LabelImg is a tool that can assist label images, personally feel very useful this one for the annotations. Detecto supports the PASCAL VOC format, in which you have XML files containing label and position data for each object in your images. To create these XML files, you can use the open-source LabelImg tool as follows:
pip3 install labelImg # Download LabelImg using pip
labelImg # Launch the application
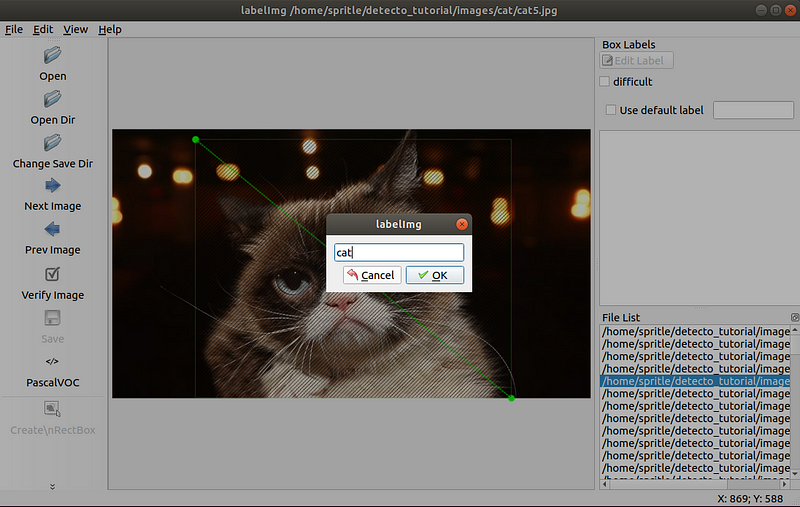
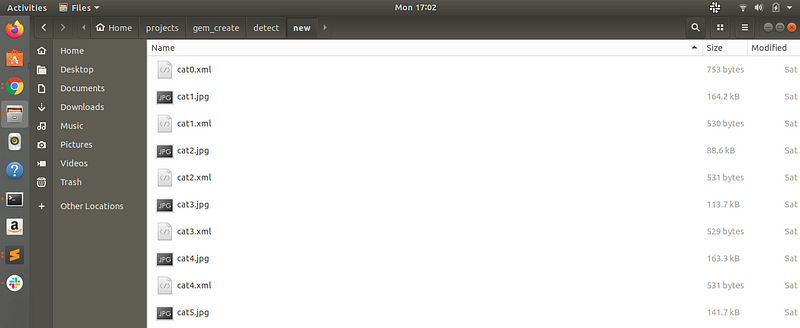
After labeling, your Image folder will be like below. if you want to know more about LabelImg, Please check out here.
Setup Google Colaboratory Notebook
Collaboratory, or “Colab” for short, allows you to write and execute Python in your browser, with
- Zero configuration required
- Free access to GPUs
- Easy sharing
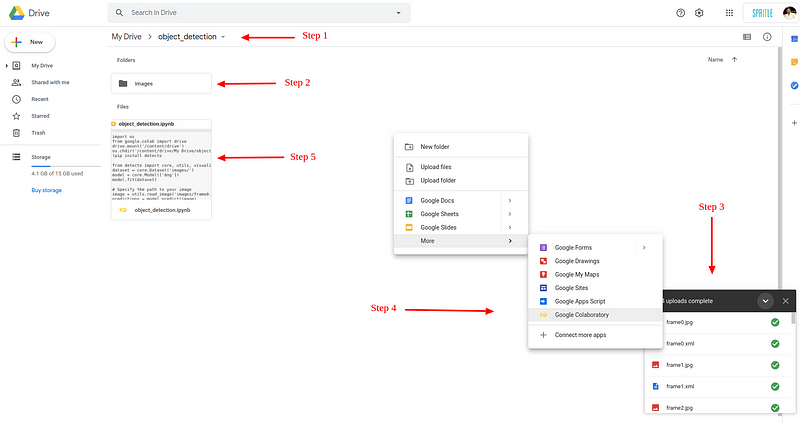
Follow the below steps to create a Google Colaboratory notebook, an online coding environment that comes with a free, usable GPU. For this tutorial, you’ll just be working from within a Google Drive folder rather than on your computer.
- Step 1: I have created a folder called object_detection in your Google Drive.
- Step 2: I have created the images folder inside the object_detection.
- Step 3: Upload your dataset images into the images folder.
- Step 4: Create a Google Colab file called object_detection.ipynb
- Step 5: You can see the result of file object_detection.ipynb has to create.
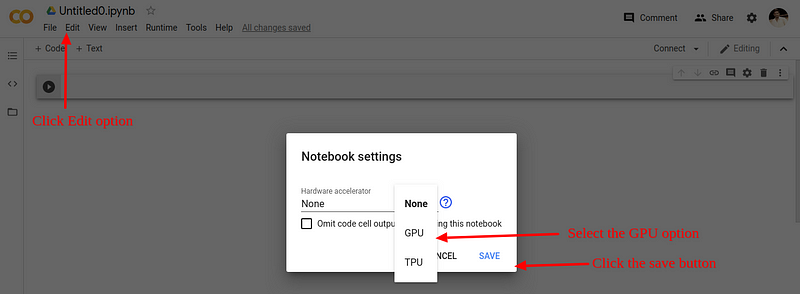
And one more important thing is, you need to enable the GPU
Edit ⇾ Notebook settings ⇾ Hardware accelerator and select GPU
Train a custom model using Detecto
We have set up the Google Colaboratory Notebook to train a model. Now we can start the coding. Here you can download my Google Colaboratory Notebook file.
Step 1: Insert a new code cell and add the below code. Run the code cell for the installation detecto in your Colab notebook.
import os
from google.colab import drive
drive.mount('/content/drive')
os.chdir('/content/drive/My Drive/object_detection')
!pip install detecto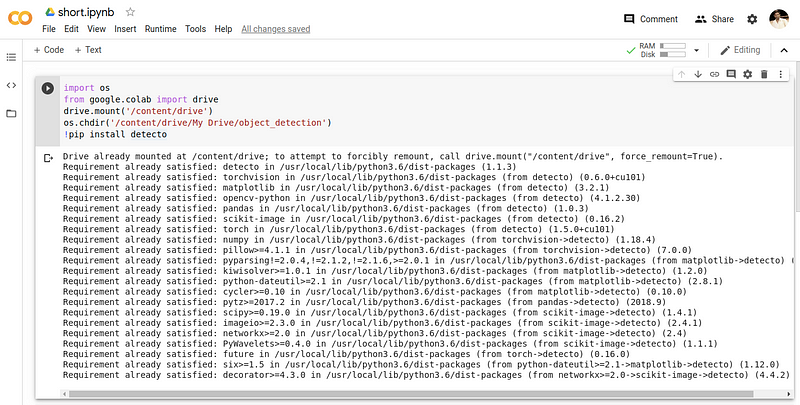
Step 2: Again insert a new code sell and copy-paste below code for start train your model.
from detecto import core, utils, visualize
#mention you dataset path
dataset = core.Dataset('images/')
#mention you object labels here
model = core.Model(['cat'])
model.fit(dataset)
So, the process will take some time, it’s based on how many datasets you have. Once the training is completed without any error, you will get the result exact below image. You can skip the user warning.
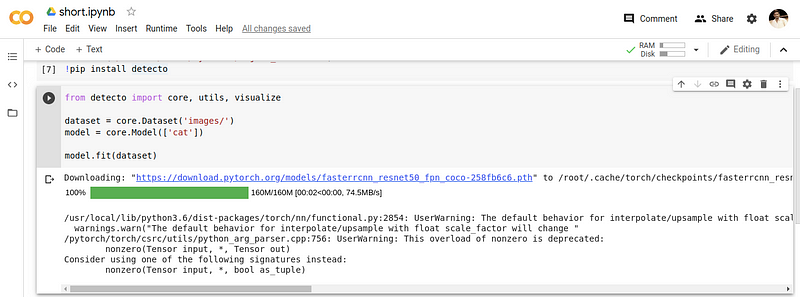
Yes!! The custom model files now ready to test.
Test and save your model
We have successfully trained our model file. Now we need to test the model file using the below code. We need to follow the same process above already we have done. Insert a new code cell and add the below code.
# Specify the path to your image
from detecto import core, utils, visualize
image = utils.read_image('animals/cat48.jpg')
predictions = model.predict(image)
# predictions format: (labels, boxes, scores)
labels, boxes, scores = predictions
# ['alien', 'bat', 'bat']
print(labels)
print(boxes)
# tensor([0.9952, 0.9837, 0.5153])
print(scores)
visualize.show_labeled_image(image, boxes, labels)
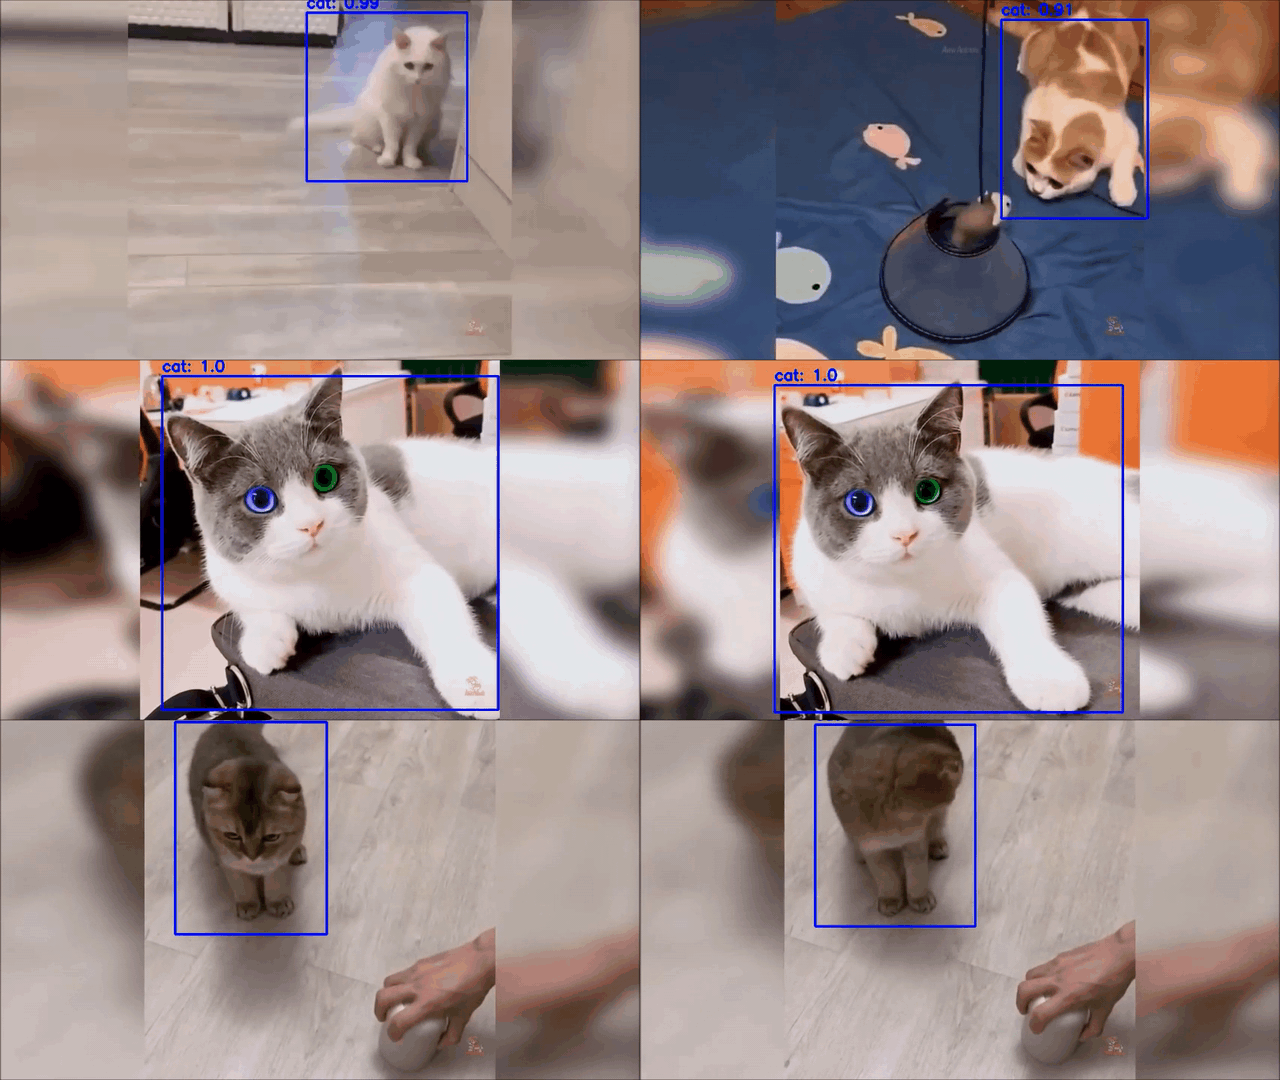
If the model is trained well, you can get a result like below image 🙂
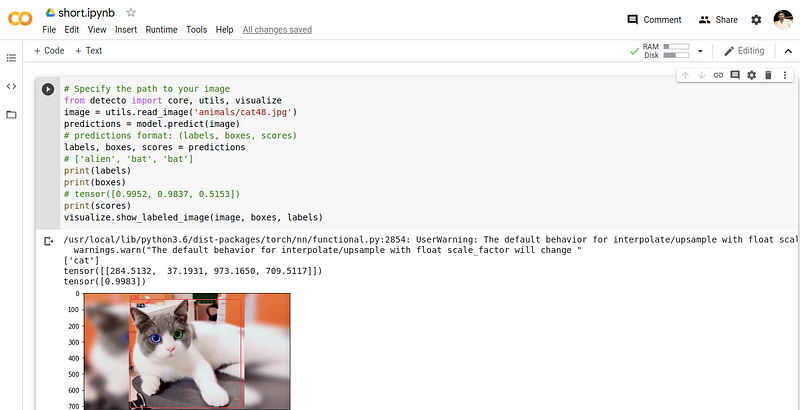
Yes, That’s it. we have trained the custom model 🙂 😉 So you can save this trained model using the below code.
model.save('cat_model_weights.pth')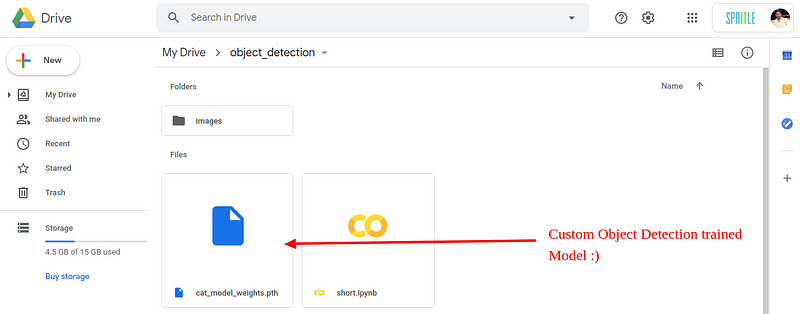
The custom model file has saved in the google drive folder. You can download and test. Check out below the documentation for more help! 😉
This is the best experience about training a custom model, because I have used some other python packages for training model. Those are very difficult to use. Now I am going to train different objects for my future ideas.
